
My Tools- With Links!
Here it is! The post you have been waiting for! I get questions about my tools often, where to find them, what I use, etc. So here is my comprehensive list with links!

You will find links at the bottom to a lot of the products I use and have ordered before. Ampersand makes their own Scrachbord tool kit which is great if you are just starting out, I also highly recommend the 5” x 5” , 5” x 7” or 6” x 6” boards to start as they come in 3 packs.
Microblading tattoo needles:
U Needles : I consider these as shaders, they are great for base layers and doing anything from leaves, flowers, eyes, branches or anything you want faded, soft, or faint. I used the U needles for the majority of this mushroom portrait. Hatching and cross hatching with this tool is very effective

S Needles: I also consider these more of a shader, but you will get a more distinct line at the tip or pointed end, Also these needles (especially the ones with the gold in the link below) are stiffer so you get more strong/ distinct parallel lines when using this tool. I used an S14 to do the branch on this kingfisher. This tool can also be effective for clumps of fur.

R Needles: These are great for feathers and fur, The R3 and R5 are very flexible so you can render curls, wavy textures and whispy fur or feathers. They are great to use to put down a base layer since they have a softer look and can help you achieve what appear to be greys. The more needles in the bunch the stiffer the needle and harsher the lines. I have used the R21 for stippling a large area but it is not as precise as an individual needle. The fur below was mostly done with the R3 and R5 needles.

1RL Tattoo needle: This is used for detail hairs and lines. It gives you a finer line for details than an xacto. I used this tool on some of the finer spider webbing in the detail below. (an x-acto was also used)

THE x-aCTO kNIFE:
X-acto Knife #11 Blade: I use this tool in every piece. From highlights in eyes, and on noses, to the final layering of detail feathers and fur, to any solid white areas, stippling. My first portraits were made only with this tool and it is by far the most versatile. A combination of my U needles and the X-acto made all of the water you see below.

fIBERGLASS bRUSHES:
This is by far the hardest tool to use but it can really speed things up in some ways as it can whiten areas quickly and achieves a nice soft, smooth faded look. While it is not my favorite some artists LOVE it. This tool can also be great for doing base layers of fur. I like to use this tool for things that are out of focus, soft textures like blankets, and out of focus fur. It is a challenge to use and yes it will shed fiberglass everywhere and if that gets in you hands (or on your pants and thus on you legs) it is very irritating. It can also be good for stippling on noses and scumbling textures. You can use a sharpening stone to refine the tip of this tool how you want it. The knitted texture below was made with a fiberglass brush.

AMPersand Scratchbords and Inks
While there is scratch paper Ampersand Arts archival scratchboards will provide a professional quality surface for an extremely reasonable price. The line quality on their boards is hard to beat. I linked several sizes below and they can be found at various retailers including Dick Blick, Jerry’s Artarama, and Amazon. They also make a white clay board which you can ink yourself and then scratch into.
Adding Color:
Any color portrait you have seen of mine was inked using the Ampersand Scratchbord inks. I love their richness and the versatility in all the colors I can achieve with their inks. I do know artists have used watercolors, water soluable inks, and even colored pencil to color their scratchboards. Some artists will scratch their area white, then paint in the color and scratch again. I prefer to go about it gradually. I scratch my entire base layer then add inks, then scratch, then add inks and repeat this process until I achieve the look I want..


VARNISH:
Krylon UV Arhival Varnish: Satin is my go to brand of Varnish. It has been exceedingly difficult to find. Typically I find the Gloss finish too shiny but it all depends on your personal preference. I used Golden Archival Varnish for a while but I had a lot of issues with the varnish getting damaged in transport or while storing since it is considered a “ soft varnish”. After many repairs I decided that wasn’t the brand for me.
Product Links Below:
Elmer's X-ACTO X3311 N0. 1 Precision Knife With 5 No. 11 Blades, #1 Knife
X-Acto® Knife Blades, No. 11 Blade, Pack Of 100
Extra Thin Fiberglass Scratch Brush
Extra Thin Fiberglass Scratch Brush Refills, 12 Pack
Economy Scratch Brush, Fiberglass, 4-1/2 Inches
Ampersand Art Supply Scratch Art Panel: Museum Series Scratchbord, 1/8 Inch Flat Profile, 8" x 8"
Ampersand Art Supply Scratchbord Artist Tool Kit for Painting & Drawing
Microblading Needles - BoChang 60 Pcs Assorted 12U, 14U, 16U, 18U
Microblading Needles 60pcs S7, S12, U18
30pcs PCD Microblading Needles S12, S14, U19
Round Microblade Needles 4 Different Types R3 R5 R7 R21 Pack of 100
Tattoo Needles 1RL, 50pcs (Single Tattoo Needle)
Ampersand Art Supply Scratchbord Line Tool
Ampersand Art Supply Scratchbord 6 Color Ink Set
Graphite SARAL TRANSFER PAPER-Tracing-Sketch-Drawing
Krylon Gallery Series UV Archival Varnish Aerosol Spray, Satin, 11 Ounce
(As an Amazon Associate, I earn from qualifying purchases. Above are paid links)
I hope this helps you out. Check out my youtube channel for tutorials and more information on my tools. Or visit my shop for a beginning scratchboard kit
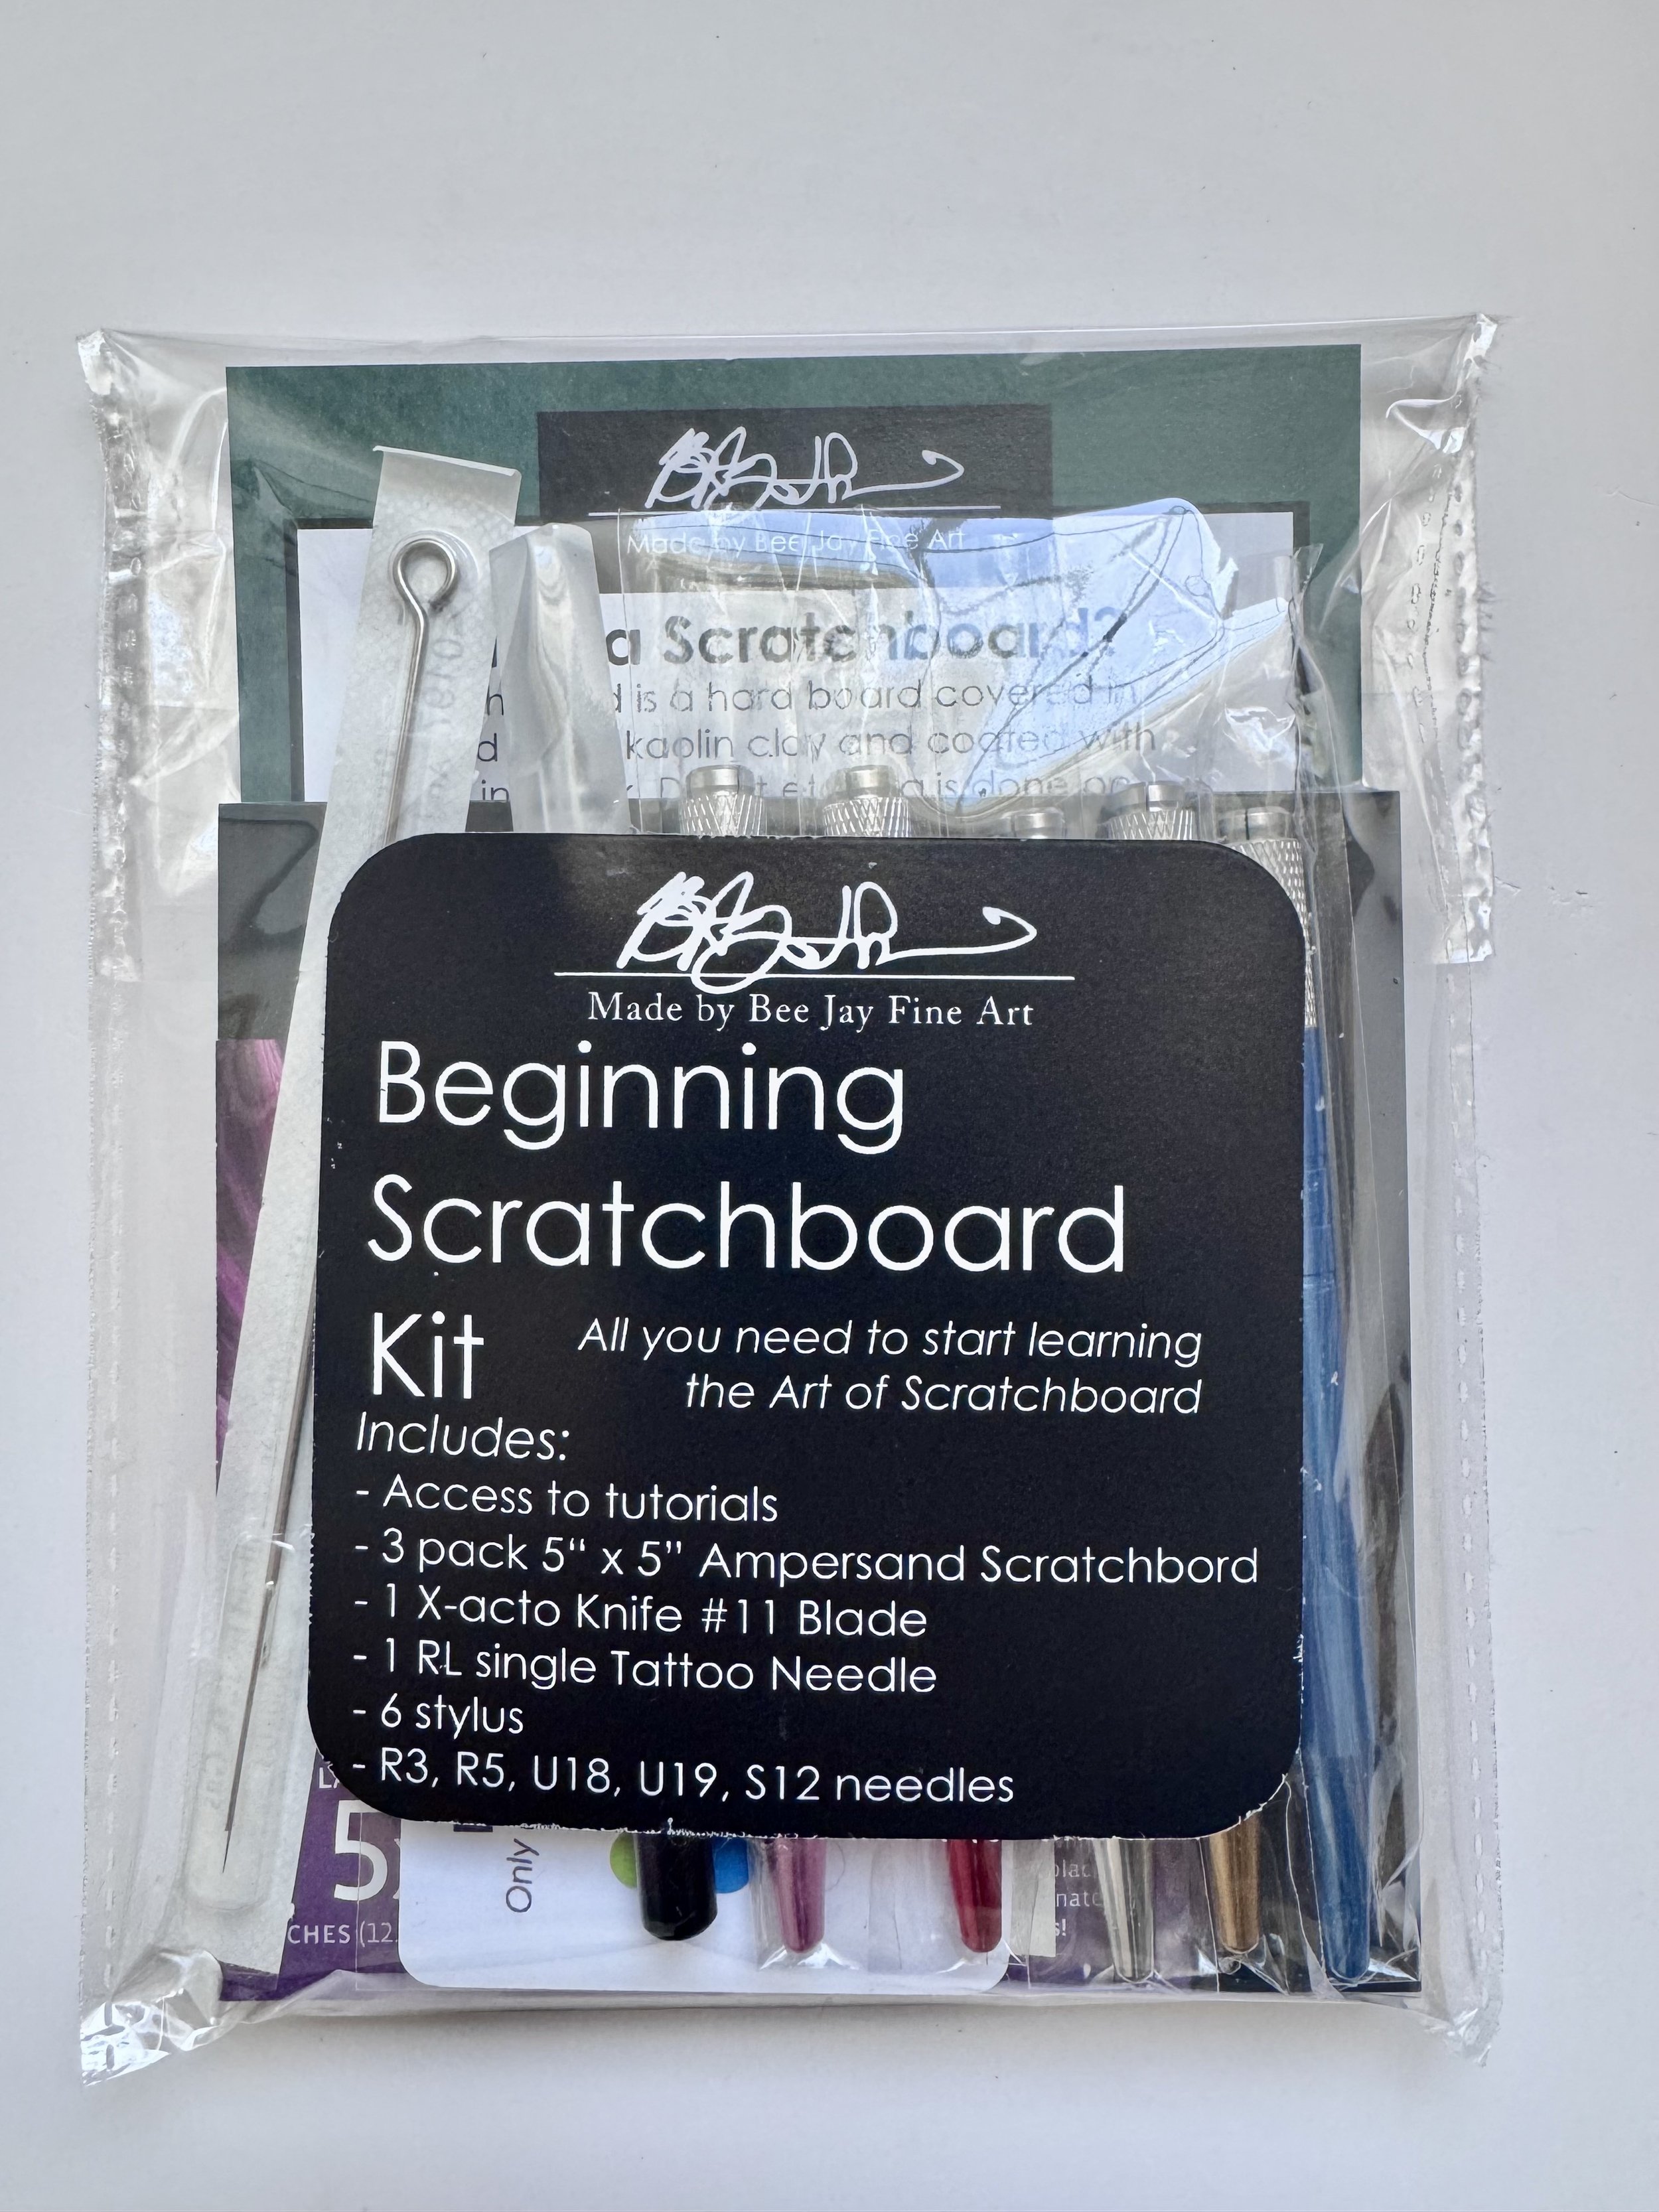
This Kit Comes Complete With:
Access to exclusive scratchboard tutorials
Hosted in a private online library that will continue to expand with new lessons and demonstrations.Three (3) 5” × 5” Ampersand Scratchbord® panels
Archival-quality scratchboard surfaces ideal for beginners and practice pieces.One (1) X-Acto® Knife with #11 blade and protective cap
For bold lines, edge work, and controlled carving.Five (5) scratchboard needle styluses
Designed to hold interchangeable needle tips for precision mark-making.One (1) RL single tattoo needle
Perfect for ultra-fine lines and delicate detail work.Five (5) interchangeable scratchboard needles:
R3
R5
U18
U19
S12
Each tool and needle type has been carefully selected to give beginners a well-rounded introduction to scratchboard techniques, including fine detail, texture, shading, and highlight carving.
Why This Kit Works for Beginners
This kit is intentionally curated to eliminate overwhelm while still offering variety. It mirrors the tool setup I use when teaching scratchboard workshops and demonstrations.